Achieving remarkable results when working with stainless steel requires attention to detail, skill, and the correct equipment. This guide aims to help novice and experienced welders alike refine their knowledge and skills of stainless steel welding techniques, tools, equipment, and more. We will discuss some of the characteristics of stainless steel, various methods of welding, and the most frequent problems that may arise. Whether it’s industrial work or a personal endeavor, this blog will help you develop strategies and processes to create polished welds effectively. Upon reading this blog, you will have the adequate knowledge and confidence to approach stainless steel welding as a professional.
How to weld stainless steel?
To begin working with stainless steel, determine the best welding procedure for your project – TIG (Tungsten Inert Gas), MIG (Metal Inert Gas), or stick welding. Make sure to filter the correct stainless steel grade filler metal to appropriately match the stainless steel being welded. Clean the stainless steel surface effectively to lessen the possibility of oxidation and bolster weld quality. A shielding gas like argon or a combination of argon and helium is ideal to prevent contamination of the weld.
Control both the heat and the movement of the weld so it doesn’t warp. When everything is done, take some time to polish the weld and make it aesthetically pleasing. Being organized with tools and proper technique sets you up for success when welding stainless steel.
Essential Equipment for Stainless Steel Welding
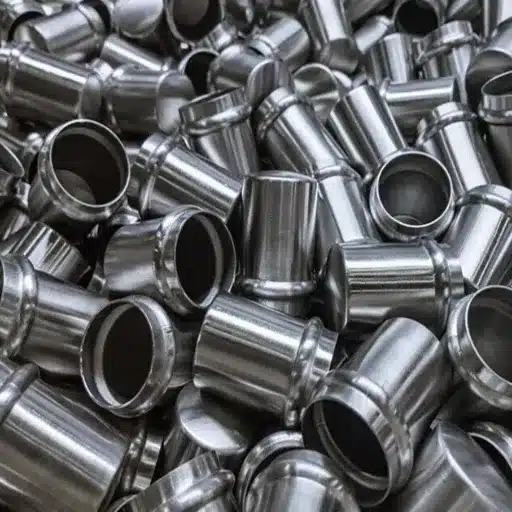
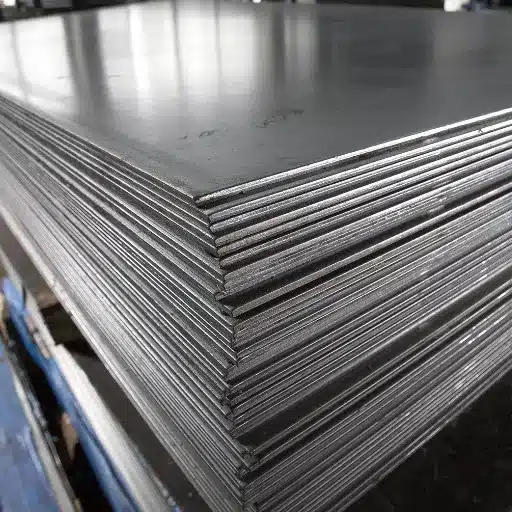
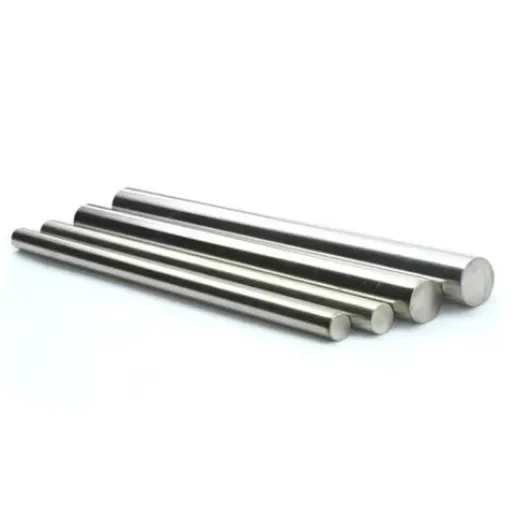
Working with stainless steel requires concrete tools to get the desired results. Firstly, since those work best with stainless steel, you will need a reliable welding machine specializing in TIG (Tungsten Inert Gas) or MIG (Metal Inert Gas). Secondly, having a quality TIG torch or MIG gun is essential to ensure the weld is precise. Finally, ensure that you have the appropriate filler rods or wires for the grade of stainless steel you are using. To shield the weld from atmospheric contamination, ensure you have a tank of pure Argon or an Argon/Helium gas combination. Moreover, buy a sturdy welding table with clamps for holding the workpiece and cleaning it later with stainless steel brushes and sonicated acetone. Don’t forget the welding helmet, gloves, protective clothes, and the stuff needed to polish the weld. Hitting all of these steps will lead to excellent results when welding stainless steel.
Choosing the Right Filler Material
The selection of filler material is pivotal when it comes to weld strength and corrosion resistance for stainless steel. To prevent cracking and reduced serviceability, the filler material must be as close as possible to the base metal’s composition. Here are some recommendations for standard grades of stainless steel:
- Filler Material for 304 Stainless Steel: ER308L filler material has a low carbon content, which minimizes corrosion resistance, and it has strong corrosion resistance contrary to carbide precipitation.
- Filler Material for 316 Stainless Steel: ER316L filler material is recommended to maintain superior corrosion resistance in marine or chemical applications.
- Filler Material for 410 Stainless Steel: ER410 filler material is the optimal choice. It is designed for high-strength applications and has a martensitic structure that matches perfectly with the base metal.
- Filler Material for Ferritic Stainless Steels (e.g., 430): ER430 filler material matches the ferritic structure while being reasonably weldable.
As for process considerations, rods are preferable filler materials for TIG welding, while MIG welding uses a wire spool. Always double-check to see if your chosen filler material meets the project’s requirements to guarantee weld quality.
Importance of Proper Shielding Gas
Properly selecting a shielding gas is crucial to achieving quality welds. In my case, shielding gases like argon or a mix of argon and carbon dioxide helps protect the weld pool from atmospheric contaminants, such as porosity or other defects. However, selecting the appropriate shielding gas is material—and process-specific. It impacts the arc stability, penetration, and bead appearance. I always suggest using material-specific and industry standards to ensure that the process is effective and efficient.
How Do I Prepare Stainless Steel for Welding?
Preparing stainless steel for welding involves proper procedures, and in this specific instance, the actions performed exceptionally affect the quality of the work produced. First and foremost, the surface must be cleaned and free of any contaminants, such as oil or other grease, as any remains can lead to defects. As with other stainless steel surfaces, care should be taken with the stainless steel wire brushes or dedicated tools used so as not to cross-contaminate from different metals. Check that the edges to be welded are smooth and, if necessary, properly beveled for penetration. The cleaning of the workpiece surfaces should also include the removal of oxidation and moisture. All metal pieces should be held in proper alignment using jigs or clamps. Following these steps will put you in a position to achieve firm and clean welds.
Cleaning and Degreasing the Stainless Steel Surface
To clean and degrease a stainless steel surface, I would soak a clean cloth or sponge in a mild detergent solution and use it to wipe the surface to lift away surface dirt and oils. An alkaline or solvent-based degreaser may be used for grease that is more difficult to remove. After washing, it is critical to rinse all residues thoroughly with clean water. In terms of line, residue free water must be utilized, the cleaning solution needs to have a pH of seven to ten, and abrasives which scratch the surface must not be used. Once the surface has been cleaned, I wipe it down with a clean, dry cloth to ensure no surface moisture on the surface may lead to oxidation.
Proper Joint Preparation Techniques
When preparing joints to be bonded, I ensure the surfaces are cleaned, dried, and free of all foreign contaminants like dirt, grease, or any old adhesive. I have specific protocols based on the material type, which include, but are not limited to, sanding or scratches on surfaces that require better adhesion help. A primer or an adhesive activator may be needed for specific applications. When applied, it must be done in a manner that guarantees even dispersion to ensure a strong bond. I gently position the joints and apply gentle but firm control until bonding is accomplished, which leads to the best results.
Setting Up Your Welding Area
In organizing my welding space, putting everything in order promotes safety and efficiency. Consequently, I constantly clean the workspace before I begin welding. First, I must select a place with sufficient airflow to reduce the buildup of harmful fumes. Second, the welding table must be set on a sturdy surface with no combustible materials around it. The workspace needs sufficient light so that I can see the weld joint, and the most effective way to do this is to set the area lit. I always have relevant PPE equipment for my health and safety, including a welding mask, gloves, and clothes that cannot be burned quickly. Lastly, tools and other materials are arranged and placed systematically to be easily accessed during the welding work.
What Are the Best Welding Processes for Stainless Steel?

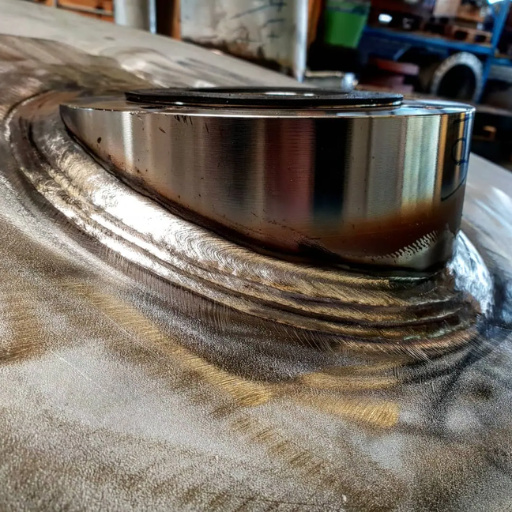
The most viable welding methods for stainless steel vary according to the application and thickness of the material. Tungsten Inert Gas (TIG) welding is often chosen – particularly when clean and precise welds are required. The ability to carefully control the heat and produce excellent welds makes TIG welding preferred for thin stainless steel sheets. Metal Inert Gas (MIG) welding is another fantastic choice when the higher welding speeds are favored or the workpiece is thicker, as it also provides strong welded joints. Arc welding can also be done on stainless steel for outdoor and more hostile conditions, but it will lead to more slag and, thus, post-weld cleanup. The selection and outcome will depend on each method’s objectives and the project requirements.
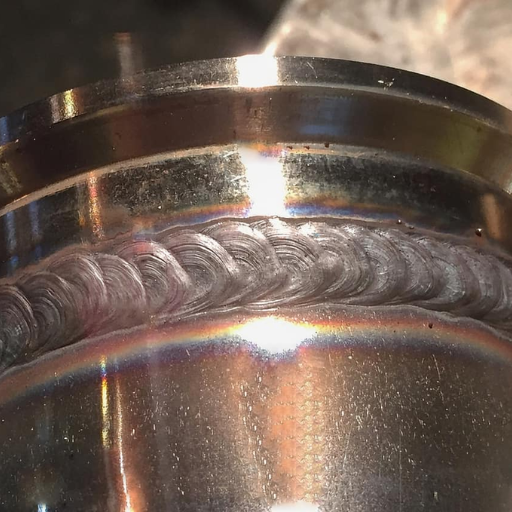
TIG Welding: Precision and Control
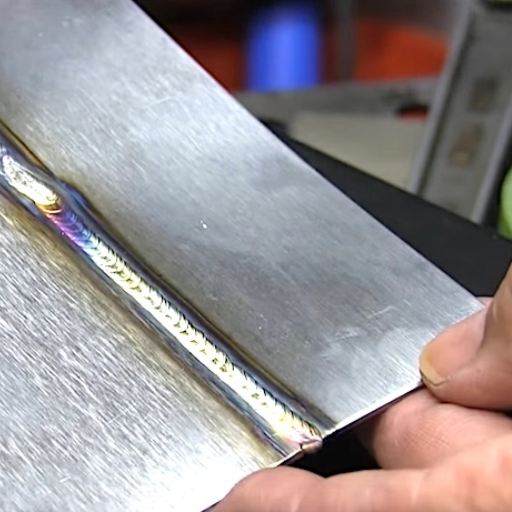
TIG welding offers unmatched precision and control, which is why it is my favored method for projects that require aesthetic and visually pleasing welds. It’s perfect for intricate work since it can handle thin materials like stainless steel without distortion. The process uses a non-consumable tungsten electrode, allowing me to give filler material and offering me complete control over the weld bead. Although it requires more time and skill than other methods, the precision achieved with TIG welding makes the effort worth it for applications that demand fine detail.
MIG Welding: Speed and Efficiency
My favorite welding method is MIG because it is fast and efficient, especially when facing bigger challenges. In comparison with other types, MIG is advanced because it involves a consumable wire electrode that is automatically fed along with a shielding gas. This inevitably makes the process more simple and productive. This method is also great for welding thicker steel and aluminum, both at an industrial level and at home.
Some of the technical parameters that I consider MIC welding include:
- Voltage Ranges: From 16-22 volts for thinner materials. Over 22 volts for thicker pieces and 30 volts for really thick metals.
- Wire Feed Speed: Quite a simple parameter that increases with the material thickness; it ranges from 100 inches per minute to 500 inches per minute.
- Gas Flow Rate: Set around 20-25 cubic feet per hour (CFH) for adequate shielding, these number can be flexible.
- Shielding gas composition: Where it gets more interesting. C02 is mild steel, while argan is preferred for aluminum.
In conclusion, this is a great method that almost anyone can learn quickly, offering consistent results when time and quality are a priority.
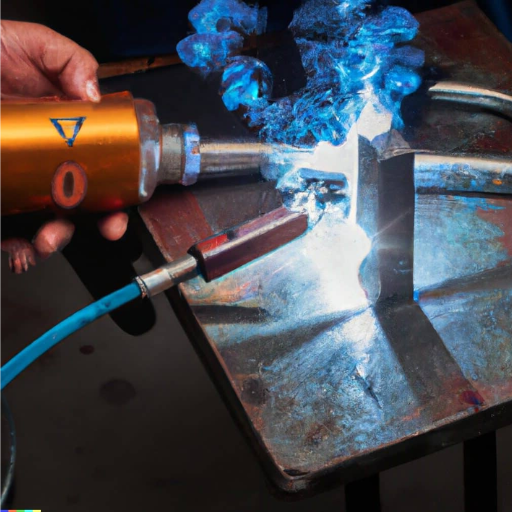
Stick Welding: Versatility in Challenging Conditions
Shielded metal arc welding, or stick welding, is known as one of the best methods under challenging conditions. This method is helpful for external work and operates efficiently in windy or wet conditions, which may be challenging for other methods. This process is accomplished using a consumable electrode covered with flux and as the electrode melts, it produces a gas that acts as a shield to prevent contamination of the weld pond.
From my point of view, stick welding is one of the simplest methods to set up because there’s no need for a gas cylinder, which makes it portable and easy to use. It may handle a variety of materials such as steel, stainless steel, and cast iron, but its most advantageous characteristic is its ability to weld dirty or rusty metals, which is essential in repair work. While it does not clean the surface as effectively as MIG and TIG welding, it is indispensable for its efficiency and flexibility.
How Do I Avoid Common Stainless Steel Welding Challenges?
To prevent problems with welding stainless steel, your area must be tidy and free from any outside pollutants that can cause dangerous imperfections in the weld. To control oxidation and uphold the quality of the weld, utilize proper shielding gas like an argon and helium mix. Always ensure adequate filler material selection for the base metal grade and structure. Since stainless steel is susceptible to expansion due to heat, manage how much energy is supplied to avoid any potential distortion. Lastly, necessary cleaning procedures, like passivation, must be performed after the weld has been completed to improve corrosion resistance while ensuring the finish is of the best quality possible.
Preventing Distortion and Warping
Even heating is maintained throughout the welding process using staggered welding or backstepping. Proper heat control ultimately reduces the possibility of distortion and warping, particularly in stainless steel. I also utilize proper clamps and fixtures to ensure the workpiece is stationary during the weld. Interpass temperature control and heat input minimization allow the workpiece to cool in between passes, which is equally as important. In addition, paying closer attention to the proper sequencing of the welds helps alleviate residual stresses. I am always careful to avoid damaging the workpiece, which is my primary goal throughout the whole process.
Managing Heat Input for Optimal Results
Effective Moderation of Heat Input consider the following parameters:
- Methods for controlling Heat input:
- Employ staggered welding or backstepping procedures that equalize heat concentration.
- Limit the duration of continuous welding to control excessive thermal temperature.
- Interpass Temperature:
- When working with stainless steel, suppress interpass temperatures to 150-230 degrees salient (300-450 degrees fahrenheit) depending on the grade welded.
- Cooling Techniques:
- Achieve the desired cooling rate between passes to eliminate welding distortion without flexible movement.
- To avoid thermal shock, replace quenches cooling techniques with air or controlled managed cooling.
- Clamping and Fixtures:
- Tightly fasten all materials during movement and welding with clamps or jigs; otherwise, uncontrolled movement is highly likely.
- Welding Sequence:
- Minimize residual stress by working systematically, such as from the center radiating outward.
- Heat Input
- Estimate Heat Input with the supplied formula:
Heat Input (J/mm) = (Voltage * Current* 60) ÷ (Travelling Speed * 1000)
- If stainless steel’s properties are to be sustained, avoid exceeding its recommended heat input values. Mechanical heat properties should be within a range of 0.5kJ/mm and 2.5kJ/mm.
By closely tracking the above parameters and procedures during technical supervision of Heat input management, the healing of welded pieces and maintaining structure integrity can be achieved. The success of achieving quality welding pieces is guaranteed.
Avoiding Contamination and Maintaining Corrosion Resistance
To maintain the stainless steel’s corrosion resistance and avoid contamination, I ensure that materials are adequately cleaned and free from dirt, oil, and other undesirable particulates. I use clean gloves to counter contamination, which are protective tools to cover the stainless steel surface. Furthermore, avoiding other forms of contamination involves allocating different tools and equipment for stainless steel and other materials. After the welds are done, mechanical or pickling cleaning might be done to remove the heat tint or oxide layers. This keeps the passive layer that helps prevent corrosion damage, which is essential during this phase.
What Techniques Should I Use When Welding Stainless Steel?
Good interpass cleanness, preventing impurities and overheating of the material for an extended period, is vital, as with any welding process. Select the right filler corresponding to the specific grade of welded stainless steel. Also, the workspace should be as tidy as possible, and fumes, contaminants, and oxidants should be nonexistent on equipment windows. In shielding welding, argon or a blend of argon and helium should be the protected welding gas that shields the weld from oxidation. Heat should be controlled within certain limits to avoid excessive distortion or heat-affected zones. The post-weld de-oxidation cleaning of the welded joints should restore the passive layer essential for corrosion and damage resistance.
Proper Arc Length and Travel Speed
Regarding stainless steel welding, my desired objective is to attain the shortest possible arc length, conveniently the diameter of the electrode or filler wire. That way, the heat input is lowered, and better control over the weld pool is achieved. In terms of travel speed, there is an inevitable speed I try to sustain to avoid too much heat for the reasons of warping and oxidation taking place. By gradually guiding these two factors, I feel an excellent level of comfort in the satisfaction of cleanliness, the weld’s quality, and the material’s properties.
Mastering Stainless Steel Weld Pool Control
Effective control of the weld pool when working with stainless steel is crucial for achieving strong, accurate, and clean welds that possess optimum physicochemical properties of the material. Optimal weld pool control is contingent on several technical considerations:
- Input Heating
Stainless steel is notorious for suffering from overheating. To prevent warping, oxidation, or breakdown of the materials’ corrosion-resistant capabilities, the heat input must always be low. It is advisable to use pulse welding techniques that oscillate between high and low currents so that overheating does not occur.
- Current and Voltage in Welding
In GTAW/TIG welding, most applications start at 40 amps and go as high as 150 amps (and this varies with the thickness of the material being worked on). When employing GMAW/MIG welding, a range of 18-20 volts is ideal to maintain a stable arc sufficient to reach smooth welds.
- Gas Host
For proper layer and base material coverage, argon or argon and helium mixture shielding hosts must be used. Argon minimizes oxidation while greatly increasing arc stability, and when added to helium, it enables deeper penetration for thicker sections.
- Electrode Type and Position
TUNGSTEN lifted pointed electrodes (for example, 2% thorium or 2% lanthanide tungsten) are traditionally utilized during TIG welding. The electrode is held at an angle of 15 to 20 degrees to better see and control the weld pool.
- Travel Speed and Positioning
To achieve uniform welds, it is essential to maintain a steady travel speed. If movement is too slow, overheating may occur; too fast, and there could be a lack of fusion in the weld bead. A moderate speed for horizontal and flat positions contributes to even distribution and good penetration.
- Cooling Intervals
While performing weld passes, it is important to allow cooling intervals to reduce heat buildup, lowering the chance of distortion while maintaining corrosion resistance.
With experience comes the ability to balance all parameters to master weld pool control when welding stainless steel. Provided professional results can be achieved, these parameters must be adjusted to fit the type and thickness of stainless steel used.
Achieving Proper Penetration
To achieve the appropriate penetration, controlling the key welding variables is critical. In my case, proper coordination of amperage, travel speed, and arc length seems to be relevant. A higher amperage setting guarantees deeper penetration but must be offset by the correct travel speed to prevent burn-through. With stainless steel, it is a good practice to start with a thin (up to 3mm) material range of 50-100 amps and adjust my settings upward for thicker materials. In addition, keeping the arc length short (approximately the diameter of the electrode) focuses the heat and makes it possible to achieve consistent penetration. Also, providing a tight joint fit-up with an appropriate electrode angle (which, in my case, is between 5° and 15 ° from the vertical position) dramatically improves the weld quality—following these parameters, considering the thickness and type of material guarantees good melt penetration on the weld.
How Do I Ensure a Strong and Durable Stainless Steel Weld?
Proper joint preparation is essential for achieving a strong and reliable weld. Remove contaminants, like grease or oxide scales that may weaken the weld. Always choose the correct filler material, which may lead to corrosion or loss of strength. Control heat input to prevent warping or too large of heat-affected zones; short arc and moderate travel speed help manage heat. Additionally, tight joint fit-up and proper shielding gas (argon or argon mixed with helium) help protect the weld pool from oxidation. With time and consistency, these principles will drastically improve the quality of the welds done.
Post-Weld Cleaning and Passivation
Stainless steel welds require post-weld cleaning and passivation treatments to mitigate corrosion. Clean the weld region of weld slag, discoloration, or oxides utilizing mechanical methods, such as brushing with a stainless steel wire brush or abrasive blasting. For chemical cleaning, follow the manufacturer’s instructions for using a pickling paste with nitric and hydrofluoric acid.
Once these processes are complete, passivation can restore the lost chromium oxide protective layer. This can be done by submersing or spraying the surface with nitric acid or other proprietary solutions. To achieve the best results, the surface should be devoid of contaminants before passivation.
Recommended Parameters:
- Cleaning Device: Stainless steel wire brush (only to avoid contaminating)
- Pickling Temperature: Room temperature unless the product specifies otherwise
- Pickling Duration: Between 30 minutes and an hour (Varies by product)
- Passivation Solution: Between 20 to 50% nitric acid solution (or other similar products)
- Passivation Duration: Between 15 to 30 minutes
These methods help reduce corrosion resistance and surface degeneration over time. However, care must be taken when using chemicals, and safety instructions must be followed.
Inspecting and Testing Your Welds
During the inspection and testing of my welds, I emphasize visual and non-destructive testing techniques to ensure quality and structural soundness. Visually, I check for defects like cracks, porosity, and improper fusion and whether the weld complies with the specified dimensions and standards. For detailed examinations, I rely on non-destructive methods, like dye penetrant, ultrasonic, or magnetic particle testing, to reveal subsurface defects without destroying the material. This will ensure that the weld is safe and passes necessary compliance checks.
Proper Cooling and Stress Relief Techniques
I achieved effective cooling and relaxation of fatigues on the welded materials by cooling them at a controlled speed that prevents cracking or warping. For most metals, the cooling needs to be as slow and smooth as possible, and this can be done through the insulation of the welds and/or proper post-weld heat treatment (PWHT). Stress relief entails heating the material to a particular temperature range of around 1100 and 1300 degrees for carbon steel. This allows the internal stresses of the material to redistribute and stabilize. The material needs to be held at this temperature long enough, depending on the width of the material and allowed to cool down gradually. This process minimizes residual stresses. Following guidelines for each of the materials and industry standards guarantees optimum mechanical performance and durability.
References
- A Guide to Welding Stainless Steel – Kloeckner Metals
- Welding Stainless Steel – Unified Alloys
- How to Weld Stainless Steel – Hobart Brothers
Frequently Asked Questions (FAQ)
Q: Why must I weld stainless steel differently from other metals?
A: Stainless steel requires special welding techniques due to its unique composition, particularly its high chromium content. This alloy is more sensitive to heat and can suffer from distortion, corrosion, and loss of corrosion resistance if not welded properly. Proper techniques ensure a durable weld and maintain the material’s desirable properties.
Q: What are the best welding methods for stainless steel?
A: The most common and effective methods for welding stainless steel are TIG (Tungsten Inert Gas) welding, MIG (Metal Inert Gas) welding, and stick welding (Shielded Metal Arc Welding). TIG welding is often preferred for its precision and clean welds, while MIG welding is faster for thicker materials. Stick welding can be used in various situations but requires more skill.
Q: What steps should I take when preparing to weld stainless steel?
A: Proper preparation is crucial for welding stainless steel. Start by thoroughly cleaning the metal to remove any contaminants. Use a stainless steel brush or acetone to clean the surface. Ensure your workspace is clean and free from carbon steel particles. Set up your welding machine with the correct settings for stainless steel, and use the appropriate filler metal that matches the base metal’s composition.
Q: What are the main challenges of welding stainless steel?
A: The challenges of welding stainless steel include heat management to prevent warping and distortion, maintaining corrosion resistance, avoiding contamination from other metals, and dealing with the material’s lower thermal conductivity. Also, stainless steel is prone to chromium carbide precipitation, leading to intergranular corrosion if not correctly managed during welding.
Q: What shielding gas should I use when welding stainless steel?
A: For stainless steel TIG welding, pure argon is typically used as the shielding gas. A mixture of argon and a small percentage (1-2%) of carbon dioxide or oxygen is often recommended for MIG welding. Some welders use tri-mix gases containing helium to increasethe penetration of thicker materials. The choice of gas can affect weld quality, appearance, and speed.
Q: How do I prevent distortion when welding stainless steel?
A: To minimize distortion, secure the workpiece using proper clamping techniques. Employ intermittent welding or backstep welding to distribute heat more evenly. Use the lowest possible amperage that still achieves good penetration and avoid overheating the material. Pre-bending or pre-setting the parts can also help counteract the expected distortion.
Q: What safety precautions should I take when welding stainless steel?
A: When welding stainless steel, wear appropriate personal protective equipment, including a welding helmet, gloves, and flame-resistant clothing. Ensure proper ventilation, as stainless steel welding can produce harmful chromium fumes. Use a fume extractor if possible. Be aware of the increased risk of electric shock due to the lower electrical resistance of stainless steel than carbon steel.
Q: How do I achieve a high-quality finish on my stainless steel welds?
A: To achieve a high-quality finished weld on stainless steel, maintain a clean work area and use the correct filler metal. Control your heat input and travel speed to avoid overheating. For TIG welding, use a post-flow of shielding gas to protect the weld as it cools. After welding, clean the weld area with a stainless steel brush and consider using pickling paste to restore the passive layer. You can polish the weld area for a mirror finish.